Friday, August 21, 2009

Building a Fender Strat from scratch! Part 4

Installing a Clapton Mid Boost Preamp in a stock strat body
I'm on a roll now. This rotary tool is my new best friend!
So the issue with the Clapton electronics is that it is designed for a specially-routed strat body. It doesn't drop-in to an American deluxe body. There are resources on the net that help: here is a brilliant page with fantastic instructions that I used as a starting point.

Here's a pic of the problem. The pc board is just a few mm too big for the available space.
Rotary tool to the rescue!


I again used the sanding drum to open up a few mm in the cavity to accommodate the pc board.


The results are fantastic. A few extra mm and the board slides right in! Easy enough to find some non-conductive cushioning, and an anti-static cover for extra protection.


Next problem: space for the battery. The Clapton strat body has an interesting solution, but I am not ready yet to put the rotary tool to the test of routing out spac
e somewhere else. I opted for the old "cram the battery under the pickguard wherever you can get it to fit" trick. Mentioned many places, and I used it successfully in the past with active EMGs. (BTW, I will never use EMGs again).

I spaced everything out on the pickguard to make sure it would work. No problems.
I originally had a superswitch for this project, but there was no way it was going to fit. I ran to the closest music store for a regular switch (I didn't have any spares of a high enough quality). All they had was a single wafer double-pole Oaks-Grigsby switch. As it turns out, it was exactly what I wanted! Here's why...

A standard five
-way switch for strats has the following pickup options:
Neck / Neck & Middle / Middle / Middle & Bridge / Bridge
On previous strat-ish projects, I put the Neck pickup on a toggle so I could add it to the Bridge and get tele-ish tones. I knew the superswitch would eliminate the need for the toggle and give me the the following options:
N / N & M / N & B / M & B / B
Well this double-pole switch does it too! It took me hours of trolling on the net to find this wiring diagram, but it was worth it! I now have the pickup config I want with no added switches.

Next up: soldering!


Building a Fender Strat from scratch! Part 3

Been a while, I know...I was sick for a while with walking pneumonia, then on vacation. So here's the scoop.

Hammering in the Wilkinson bridge bushings:
First I used a drill with a 3/8" bit to ream it out a little bit, used a piece of tape on the bit as a depth marker. I was very careful not to do too much, I wanted the bushings as tight as possible: string vibrations from the bridge pass through the posts and bushings into the body of the guitar. I used the cardboard backing and a few pages from a notepad to cushion the hammer against the bushing, and carefully banged away until it was nearly flush with the body. At that point, I used the old Fender bushings, again separated by paper as cushioning, to get the Wilkinson bushing to counter sink in the body. Unfortunately I didn't get any pictures, I was impatient to get this project finished!
Here are a couple of close-ups of the bushings (and the posts and the bridge).


Once the bushings and posts were in, it became apparent that the cavity for the bridge does not accomodate the Wilkinson as a drop-in. I knew that ahead of time though. One of the great features of these Wilkinson VS100 bridges is the mechanism that holds the trem arm is super cool. However, it also needs a little more space to move freely in the bridge cavity than the stock Fender whammy. I started out with sandpaper, enlarging the bottom of the cavity. That wasn't gonna work. Take too long. I bought a rotary tool, or a "Dremel", and used the sandpaper drum. Wow. I wish I had that thing years ago.

For anyone working on guitars, you gotta get one of these things. Mine is a cheap "Jobmate" from Canadian Tire and I love it. $30. What would have taken me HOURS by hand took 2 minutes, and it is perfect!

Anyway, I added the claw, springs, posts and it's all ready for strings. Next up: Figuring out how to fit the Clapton electronics into this stock strat's body!

Friday, June 19, 2009

Pulling bushings out of a Deluxe Strat

OK, I did it. I couldn't wait any longer. I pulled those damn bushings out of the body. I had promised my 12 year-old nephew that I wouldn't do anything without him there, cos he's a budding guitar player and wants to watch me build this mahogany strat from the parts I have assembled. I just couldn't wait!
By the way, I looked
everywhere for a real bushing puller. No place in the GTA appears to have anything similar. I had some challenges with making one, per this post, so I thought I would shop around, call around, ask around ...nothing. I was describing the device to my 76-year-old dad, that took quite a while, but he kept asking questions. Well, whaddayaknow, he shows up at my house the next day with one that he made in a half our in his garage, based on what I described! He had never seen one before. Here is his.


Holy crap! Wow, I am impressed, Dad! I added the lock nut, but the rest was all his. Look at this one for $35 USD at StewMac. The biggest difference is that my dad used a piece of aluminum railing instead of steel tubing to make the slotted box.

All I did was add a washer around the nut/pivot screw to pull it out. I couldn't wait any longer to see if it would work, so I laid a cloth on the guitar to protect the finish, and a large washer under the bushing puller to distribute the force across a wider area. Bingo, the bushings came right out. But there was a minor accident...

I'm a little embarassed. The guitar finish is far from ruined, but the finish is visibly marred around the top bushing and mildly marked around the lower bushing. Here's what happened: Fender installed the bushings before finishing the guitar, and some stain/clear coat covered the edges of the bushing. I didn't check what was happening before it was too late. I ovviously did the upper bushing first, then I used a sharp knife to scrape away as much of the finish around the lower bushing before pulling it. Oh well...a victim of my own impatience...

So, the next step is to put the Wilkinson bushings in place of the ex-Fender bushings. Easy enough!
Well, yet again, the AllParts claim as a drop-in Wilkinson VS100 is bogus. The AllParts Wilkinson bushings provided are 1mm wider than the Fender bushings, so I have to (ever so slightly) enlarge the holes. I will never purchase AllParts products ever again! I'll put the bushings in and move on to the next step...


Tuesday, June 9, 2009

Building a Fender Strat from scratch! Part 2

Okay - I have assembled all the necessary parts, I think, except for one: a simple 5 way switch. I ended up with a 5way SuperSwitch, but I don't know if I can use it, for the reasons outlined in a later post. Here's the list of parts:
  • Mahogany Strat body - Fender USA 2004
  • Fender USA 60th Anniversary neck - 2006 (mmmmmmm), with LSR nut, abalone dots
  • Brushed chrome Sperzels (already installed them)
  • Fender Deluxe neckplate
  • B-W-B SSS pickguard (I might get a black mirror or solid black one in the future)
  • Black AllParts Wilkinson VS100 bridge (see previous post for more on this)
  • Kinman AVN pickups (currently on my PRS SE)
  • Clapton mid-boost circuit (active circuit with volume, TBX, mid-boost)
  • Black jackplate
  • Black pickguard screws
  • Some interesting black knobs I pulled off a Spector NS-6 (korean)
I haven't pulled the Kinman pickups out of the PRS yet, since I need it for gigging. Not sure what I will do with the PRS, one of the nicest guitars I own. Let it be known that, IMHO, Korean-made PRS SE guitars are some of the nicest you will find in the price range. A true steal, and lend themselves very well to upgrades - pickups, tuners, bridges, etc. Where else will you find a mahogany body, mahogany set neck, rosewood fretboard, PRS tremolo, 25" scale for so cheap? Even the ceramic-magnet pickups sounded OK, although I don't know why they put 500k pots in it. Really bright! I also own a PRS Tremonti SE upgraded with TonePros bridge and SD pickups. Anyway, I'll talk about all my guitars in another post.

I'll get started putting the guitar together later this week maybe...I have to make some sort of bushing puller first...

Cheers,
p

Not all Wilkinson VS100 bridges are the same!

Found this one out the hard way, folks!
Those of you that are modifying strat-type guitars with this bridge, BEWARE!

Wilkinson VS100 bridges are licensed to different manufacturers. Diff
erent manufacturers have their choice of metals, apparently. AllParts licensed Wilkinson VS100 bridges appear to made of inferior metal. I don't know what the pivot screws are made out of, steel I think, but the sustain block is definitely not steel. In addition, the AllParts version is not a simple drop-in replacement as you may think: the pivot screws are a different size thread than the original Fender bushings. If you buy an AllParts Wilkinson VS100 you will have to pull the original Fender bushings out. It's not impossible to do, but it is far from "drop-in".

I think the Gotoh Wilkinson VS100 has a steel sustain block. The pivot screws for the Gotoh-licensed Wilkinson VS100 will screw into the Fender bushings, but you will lose the "locking feature" of the Wilkinson pivot screws.

This is very cool... The Wilkinson pivot screws are hollow with an internal screw that allows you to set the depth of the pivot screw. To use this, you need to use the Wilkinson bushings that have a solid bottom. It is my understanding that the original Fender bushings are hollow all the way down, so that if you were to keep them in the guitar, the locking screw would begin pushing into the wood rather than the solid bottom of the bushing. I will be finding out over the next week or so, and I will let you know. Either way you would have to pull the bushings out.

The reason this pisses me off a little is that I would have bought a Gotoh Wilkinson VS100G instead of an AllParts Wilkinson VS100G, had I know the difference! The online store where I purchased it did not specify Gotoh or AllParts, so make sure you ask. I will likely make do with the AllParts version and look into upgrading the steel block at some point if I'm not happy with the sustain.

Another PITB: the body didn't come with the pivot screws, so I had to order them in. Odd that no place in the greater Toronto area had any in stock. Thank god for ebay! I couldn't even find a bolt/screw with the right threads over at Home Depot (I think they are 1/4" - 28). You need the bolts/screws so you can pull the bushings out. I'll let you know how that goes in a later post...

Cheers,
p

Friday, May 29, 2009

Building a Fender Strat from scratch! Part 1

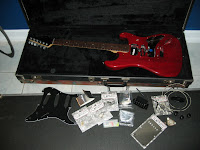
...well, not exactly from scratch. I purchased a Fender mahogany strat deluxe body from The Stratosphere on ebay, then a Fender 60th anniversary neck from nadimp809. I installed locking sperzel tuners. Here's a pic of the beginning of the project:


I'm very happy with the potential, the neck is beautiful and the body's excellent. I have always preferred mahogany. I have a PRS SE that I modded with Kinman pickups, locking PRS tuners to function as my strat. PRS SEs are IMHO the best deals going - inexpensive, well-made mahogany guitars that play fantastic! 25" scale, too which is great for my smaller hands. I know the strat has 25.5" scale, which translates into a more transparent tone (to my ears). The longer scale will provide more of the fundamental pitch. Shorter scales seem to provide more overtones, which explains why Strat tone is often referred to as 'transparent'.

Next step for this project is to assemble all the parts I need: pickguard, bridge, electronics, etc. I already have the Kinman pickups that I am really happy with. They are dead silent on gigs and sound like a vintage single coil. More in the next post!

Cheers,
p